Managing your backups with rclone & Scaleway Glacier
⚠️ This article is an automated translation. While I personally reviewed the content before publication, some inaccuracies may remain. Read the original French version.
When I rebuilt my “home” infrastructure in late 2024 (as my 2015 dedicated servers were starting to slightly reach their end of life), I decided to take the time to think about a real backup strategy. Indeed, backups have long been one of the (many) poor relations of my infra: every night I performed a full backup of my data to one of the FTP servers included in Scaleway’s “Dedibox” offer. To quickly summarize my old backup system, we can note that, on the positive side, it worked (and that’s already not bad). On the negative side… in no particular order, it was slow, it was atrocious in terms of space optimization (140GB every night, yay!), I couldn’t recover a specific file or folder. To summarize, it was a fun way to operate, but it smelled strongly of the 2000s. We’ll skip the basic notions of security; the FTP connection wasn’t even encrypted. 🥴
Anyway, it’s late 2024, and I need to find a new backup solution. Especially since my infrastructure is starting to have other uses: indeed, several relatives are starting to use my storage to store quite a few files (notably backups of old digital photos, and huge 40MB RAWs).
At first, I tried to keep a fairly “conservative” approach for my backups; and I started searching for a self-service “block” storage (FTP type or similar with SCP or other). I came across Hetzner’s storage boxes but I was dubious about the performance; and the fact of continuing to do my backups “the old-fashioned way” with big .tar.gz files depressed me a bit.
Having been a very good Scaleway customer over the last decade, I had heard about their object storage and notably their “Glacier” offer, the famous storage located in a bunker under Paris. And I admit I really wanted to try playing with it a bit! On the one hand because it’s a French provider and sovereignty is close to my heart, on the other hand because I handled a lot of object storage in my previous job, and I found the technology perfectly appropriate.
What is object storage?
To summarize very simply and briefly, object storage is simply a storage space that you access via an HTTP API. This allows you to access and manage your files without having to perform a mount point, manage the extension of a disk space, or even the type of file system. In return, of course, performance will be lower. If you try to run a Counter-Strike game server on object storage, spoiler alert, it’s going to lag!
It’s a concept that was invented by Amazon (with AWS), under the sweet name of Amazon S3. It’s, for the anecdote, the first “cloud” service that saw the light of day; since it’s with S3 that AWS landed on the market in 2006! It would take nearly 3 years for competition to establish itself. That’s why most Cloud Providers that provide an object storage service often talk about “S3-compatible” APIs: as everyone had started using Amazon S3, other Cloud Providers decided to take the same implementation for their own object storage services, in order to be compatible from the start with the various tools on the market. Scaleway is no exception to the rule.
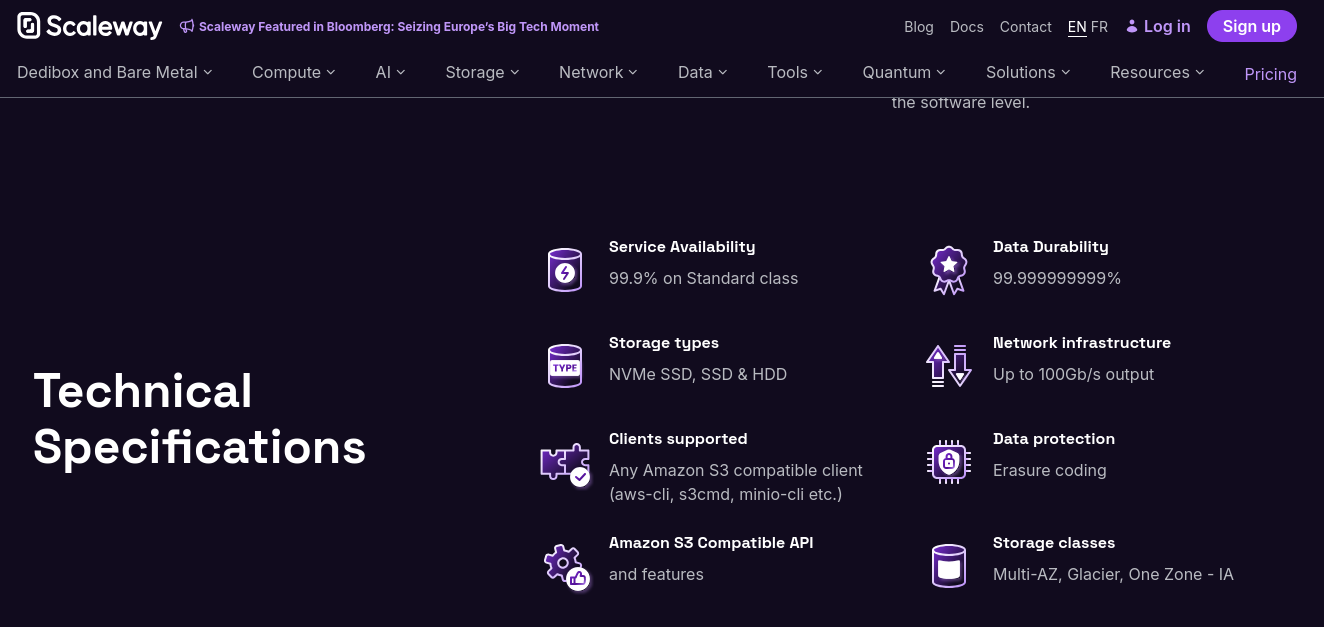
Figure 1: Description of Scaleway’s object storage.
Object storage being known for being very simple to use, very inexpensive compared to block storage, and exposing its files directly on the Web via HTTP, it’s a very popular storage medium for hosting static files (images, videos, etc.)! For example, Minecraft players’ skins are stored in S3. Without even realizing it, you are already a user of an object storage system; whether it’s Amazon’s or another.
By the way, if you wish, know that you can install your own object storage server at home! Many projects indeed offer an implementation, S3 compatible or not: OpenStack (with Swift), SeaweedFS, among others.
In order to maintain a structure in your files, it is quite possible to create folders and sub-folders (and sub-sub-folders, anyway, you get the point) to structure your data. Furthermore, an object storage space is called a bucket. Each bucket will, depending on the cloud provider, have its own characteristics (number of replications, type of storage, etc.). In fact, for the vast majority of Cloud Providers, object storage billing will be done by the bucket.
What is Scaleway Glacier?
Glacier is Scaleway’s “cold-storage” solution. Indeed, among Cloud Providers, data is distinguished according to the access time one wishes to have:
- Hot-storage will concern all the data you need to access very frequently, and in a short time (a few milliseconds). If we take our Minecraft skins example from earlier, we are totally in this definition: skins must load quickly, at any time.
- Cold-storage will concern data that can be offloaded after being sent. Here, we will find backup data, data related to legal reasons, etc. This storage is generally much less expensive because, unlike hot-storage data, it is not kept on disks or replicated in real-time: it is indexed and then stored on more durable media, generally tape storage. This way of doing things allows keeping data safe at a lower cost, but of course prevents real-time reading. When you wish to access your data, you will have to wait (generally, several hours) for a small robot to go get the tape, read it, and provide you with the files.
So you’ve understood, we’re talking about cold-storage here: I consider it totally acceptable, for personal use, to have a delay of a few hours for my files to be made available again. After all, I manage a Nextcloud at home, not a multinational.
What is rclone?
rclone is a tool designed to facilitate the use of our famous object storages, by offering a unified command-line interface; and numerous automatic synchronization capabilities between your “real” infrastructure (VM, dedicated, container, etc.) and your Cloud Provider. The GitHub project describes the project as being “rsync for cloud storage”. Notably, rclone allows copying and synchronizing files between your machine and your Cloud Provider, but also mounting your object storage as a volume (even if the performance will very probably be atrocious), and acting as a server (HTTP, WebDAV, SFTP and even DLNA) for your local (or remote!) files. In short, it’s a real toolbox for anyone using object storage.
The project is available on GitHub, under the MIT license.
Backing up our data
The Scaleway part
Now that the introductions are made, it’s time to set up our backup!
The first step to do is to create a bucket. In the Scaleway Console, go to “Storage => Object Storage”, then click on “Create a bucket”.
We could also do this with a bit of OpenTofu, but the setup is way too long for our example, so I’m going for the simplest.
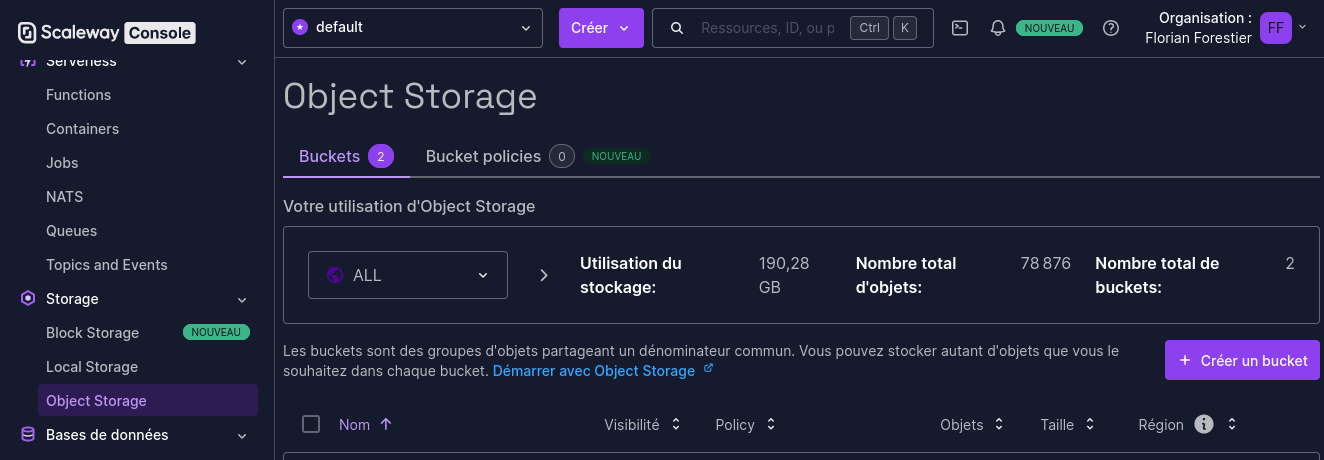
Figure 2: The Scaleway console.
Then create your bucket with the configuration you prefer. Personally, here’s what I use as parameters:
- Region: Paris
- Bucket visibility: Private - note: if you set visibility to Public, you will be able to access your files, without authentication, via HTTP. This is very probably not what you want for data backup…
- Use case: Backup and archiving (it has no interest, it’s for Scaleway’s stats)
- Bucket versioning: It all depends on whether you want to keep several versions of your files or not. Personally I enable it, but keep in mind that this option is billed…
- Free trial: Disabled
Now that your bucket is created, you can create lifecycle rules. These rules will allow you to automatically delete data that is too old to be kept. For example, you can define that data that has not been accessed for 2 years no longer represents any value and can be deleted. This allows you to keep control over your used storage, and therefore your bill. These lifecycle rules apply by default to all objects in the bucket, but you can also define filters based on file names or metadata. You can also automate the transition of a file from hot-storage to cold-storage if it has not been accessed for a long time, which allows you to have automatic optimization of your files’ location according to their real use!
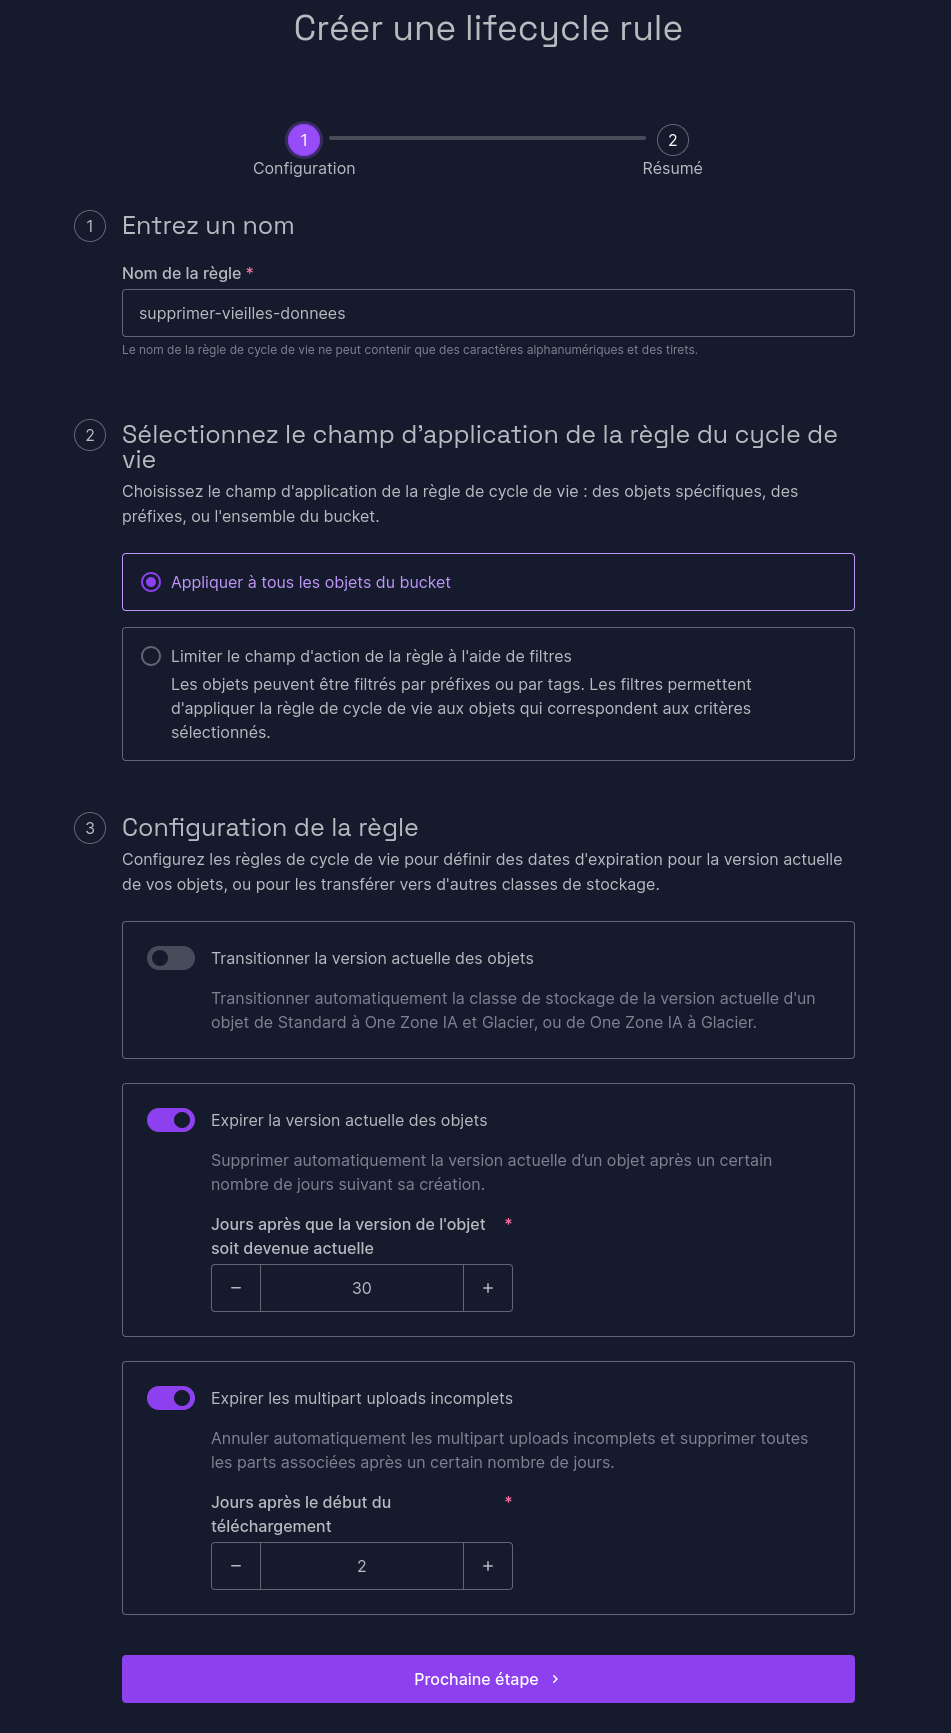
Figure 3: A Scaleway lifecycle.
Here for example, I define that files older than 30 days, and uncompleted uploads older than 2 days must be deleted from the bucket. Of course, it’s up to you to adapt according to the sensitivity of your files and the retention you wish to apply!
Now that our bucket is configured, we need to generate an API key. In the “Organization” menu at the top right, click on “API Keys”; then “Generate an API key”. Here are the parameters to indicate:
- Key bearer: Myself
- Will this API key be used for Object Storage?: Yes, and keep the “Default” project (unless you modified it).
Then keep the provided key and secret very carefully; you won’t be able to find them afterwards! Now that we’re ready on the Scaleway side, it’s rclone’s turn.
Configuring rclone
For our rclone, I’m going to use a good old Docker container and crontab. As you’ve understood, we’re very far from a sexy configuration (we could have done a Kubernetes cron or other), but once again, I’m trying to keep the article simple and clear. Feel free to adapt what I’m presenting to your stack. For example, at my place, it runs in a Docker Swarm with swarm-cronjob.
Let’s start by creating our /srv/rclone.conf file:
[BUCKET_NAME]
type = s3
provider = Scaleway
access_key_id = YOUR_ACCESS_KEY_STARTING_WITH_SCW
secret_access_key = YOUR_SECRET_KEY
region = fr-par
endpoint = s3.fr-par.scw.cloud
acl = private
storage_class = GLACIER
Replace the three placeholders with the values obtained previously. In this file, we indicate to rclone how to authenticate to Scaleway, what type of storage to use, and the name of our bucket. If you have modified some parameters (region, access rights), feel free to modify. Complete documentation is available here.
As we are starting a Docker container, we are going to need to define a mount point for our data. Here, we are going to mount the content to be backed up into /data.
docker container run -d --name rclone \
  -v /srv/rclone.conf:/config/rclone/rclone.conf:ro \
  -v /srv/data/to/save/:/data/srv:ro \
  -v /home:/data/local_homes:ro \
  rclone/rclone \
  copy /data BUCKET_NAME:BUCKET_NAME/
This Docker command will mount the previously created configuration file and allow you to back up the content of your two folders /srv/data/to/save and /home into your bucket. Remember to change BUCKET_NAME in the command! Once again, it’s far from perfect (one would prefer to store keys and configuration in more appropriate places than directly on disk for example), but at least our POC works! Once the command is executed, your data should start appearing on your object storage. Now that you’ve understood the principle, it’s your turn! Configure the folders you want, point your database backups to places read by your container, and let rclone manage it for you.
Last step: Automate the backup
Automate
For this example, we will keep it very simple and use crontab.
Open the crontab (crontab -e) of a user capable of executing Docker commands, and add the following line:
0 4 * * * docker start rclone
There you go, your backup will launch every night at 4 AM!
And does it work?
I’ve been using this system in production for 6 months now, and I’m delighted! Thanks to versions in my bucket, I can keep versions of my files and go back very simply. rclone offers many very practical functions including performing a recovery from our object storage. I can manage my files individually, which prevents me from downloading a 200GB dump every time I need a specific backup.
Small nuance however, I presented a “simplified” version of the installation of such a system here: For a real deployment, I strongly encourage you to do a cleaner deployment than the one presented (Kubernetes or Swarm secrets & configurations are your friends).
Cost-wise, it’s also very affordable: For about 200GB backed up, I’m at less than 50 cents per month. In other words, it’s reliable, it’s simple, and it’s affordable; everything we need for a home infra!
Above all, as rclone is compatible with dozens of providers (including some that can be self-hosted), I’m not locked in with Scaleway: if I one day decide to change provider, I’ll be able to do it without spending days reconfiguring everything. Of course, the question arises of backup externalization and the risk it poses, but that’s for another time… 😉
Help, I need my backups!
You need files from your backups? Several options are available to you!
Option 1 - Graphical interface
The simplest is to log in to Scaleway’s graphical interface, download your files and then send them back to your server.
Well, it’s not glamorous… We can do better, maybe?
Option 2 - CLI!
Remember our Docker container above? Let’s look at the command line running inside it:
rclone copy /data BUCKET_NAME:BUCKET_NAME/
Here, we see that rclone will launch a copy of all the content from /data to BUCKET_NAME:BUCKET_NAME/. To recover files or folders, just reverse the directions! By generalizing our command a bit, in the end, it looks like this:
rclone copy SOURCE DEST
Suppose for example you need to recover the content of the nextcloud folder from the bucket and store it temporarily in /backup. The command will then be:
rclone copy BUCKET_NAME:BUCKET_NAME/nextcloud /backup
And it’s as simple as that! If one wishes to do it directly in a Docker container, it’s hardly more complicated:
docker container run -d --rm --name rclone-restore \
  -v /srv/rclone.conf:/config/rclone/rclone.conf:ro \
  -v /srv/restoration:/backup \
  rclone/rclone \
  copy BUCKET_NAME:BUCKET_NAME/nextcloud /backup
This container will thus store all recovered files in /srv/restoration and delete itself once execution is finished.